

Chapter 83: Inserting Shapes and Screenshots
Chapter Description
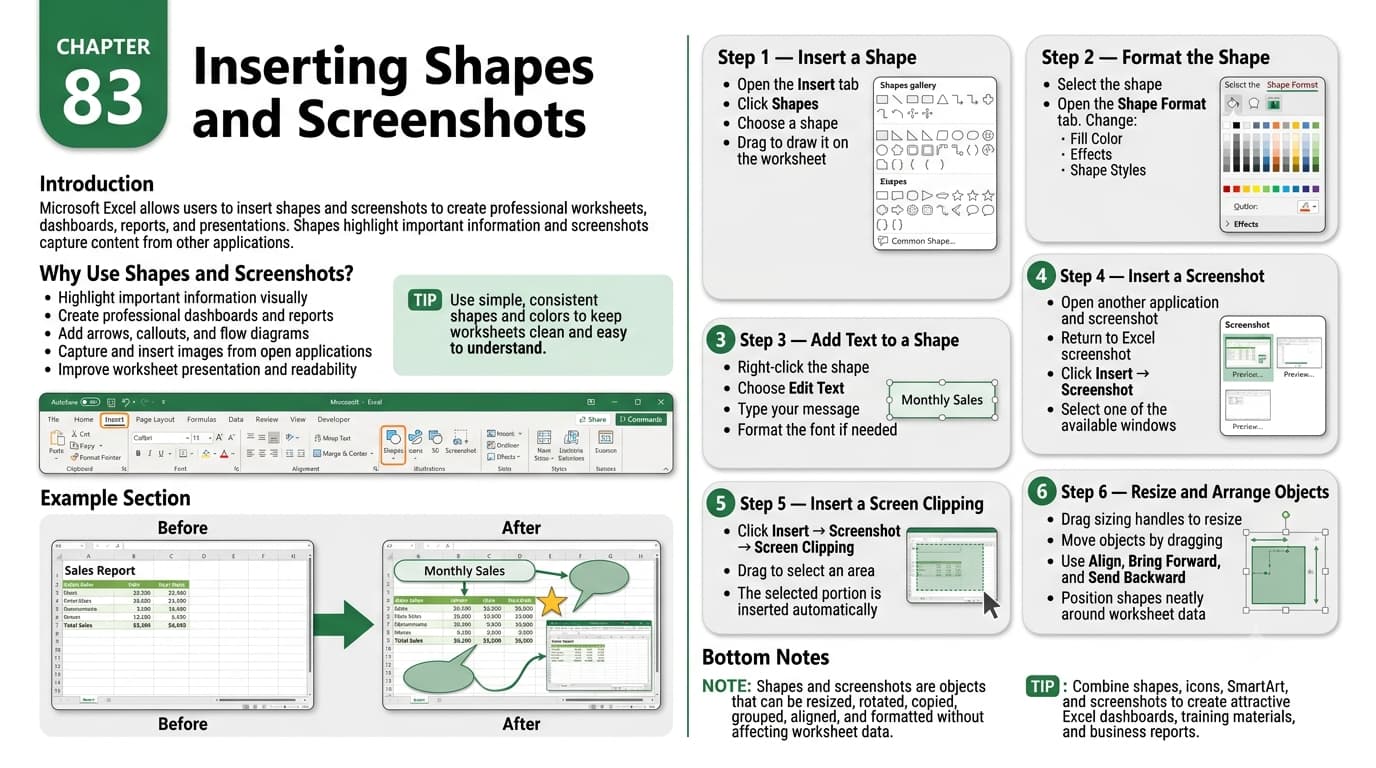
In this chapter, you’ll learn how to insert shapes and screenshots in Microsoft Excel to enhance the visual appeal and clarity of your worksheets. Shapes can be used to create diagrams, highlight important information, and illustrate processes, while screenshots allow you to include images of applications, documents, or web pages directly within your workbook.
You’ll explore how to insert and customize shapes, add screenshots and screen clippings, apply formatting effects, arrange and align objects, and use drawing tools to create professional-looking worksheets. You’ll also learn best practices for integrating visual elements without affecting worksheet readability.
This lesson is especially useful for creating dashboards, instructional documents, project plans, flowcharts, business reports, and training materials.
What You’ll Learn
- Understanding shapes and screenshots in Microsoft Excel
- Inserting built-in shapes into a worksheet
- Adding screenshots and screen clippings
- Formatting shapes with colors, outlines, and effects
- Resizing, rotating, and positioning objects
- Aligning and arranging multiple visual elements
- Using shapes to create diagrams and callouts
- Best practices for enhancing worksheets with visuals
Learning Outcome
By the end of this chapter, you’ll be able to confidently insert and customize shapes and screenshots in Microsoft Excel, creating visually engaging and professional worksheets that effectively communicate information and improve presentation quality.